For your convenience, Glance generates a customized cobrowse script tag for your account that you can copy and paste into your company website.
1. Find your Cobrowse Script Tag
To locate your unique script tag:
- Go to glance.net and click My Account.
- Log in using your Glance Address and Password.
- Under Account Management, click the Settings tab.

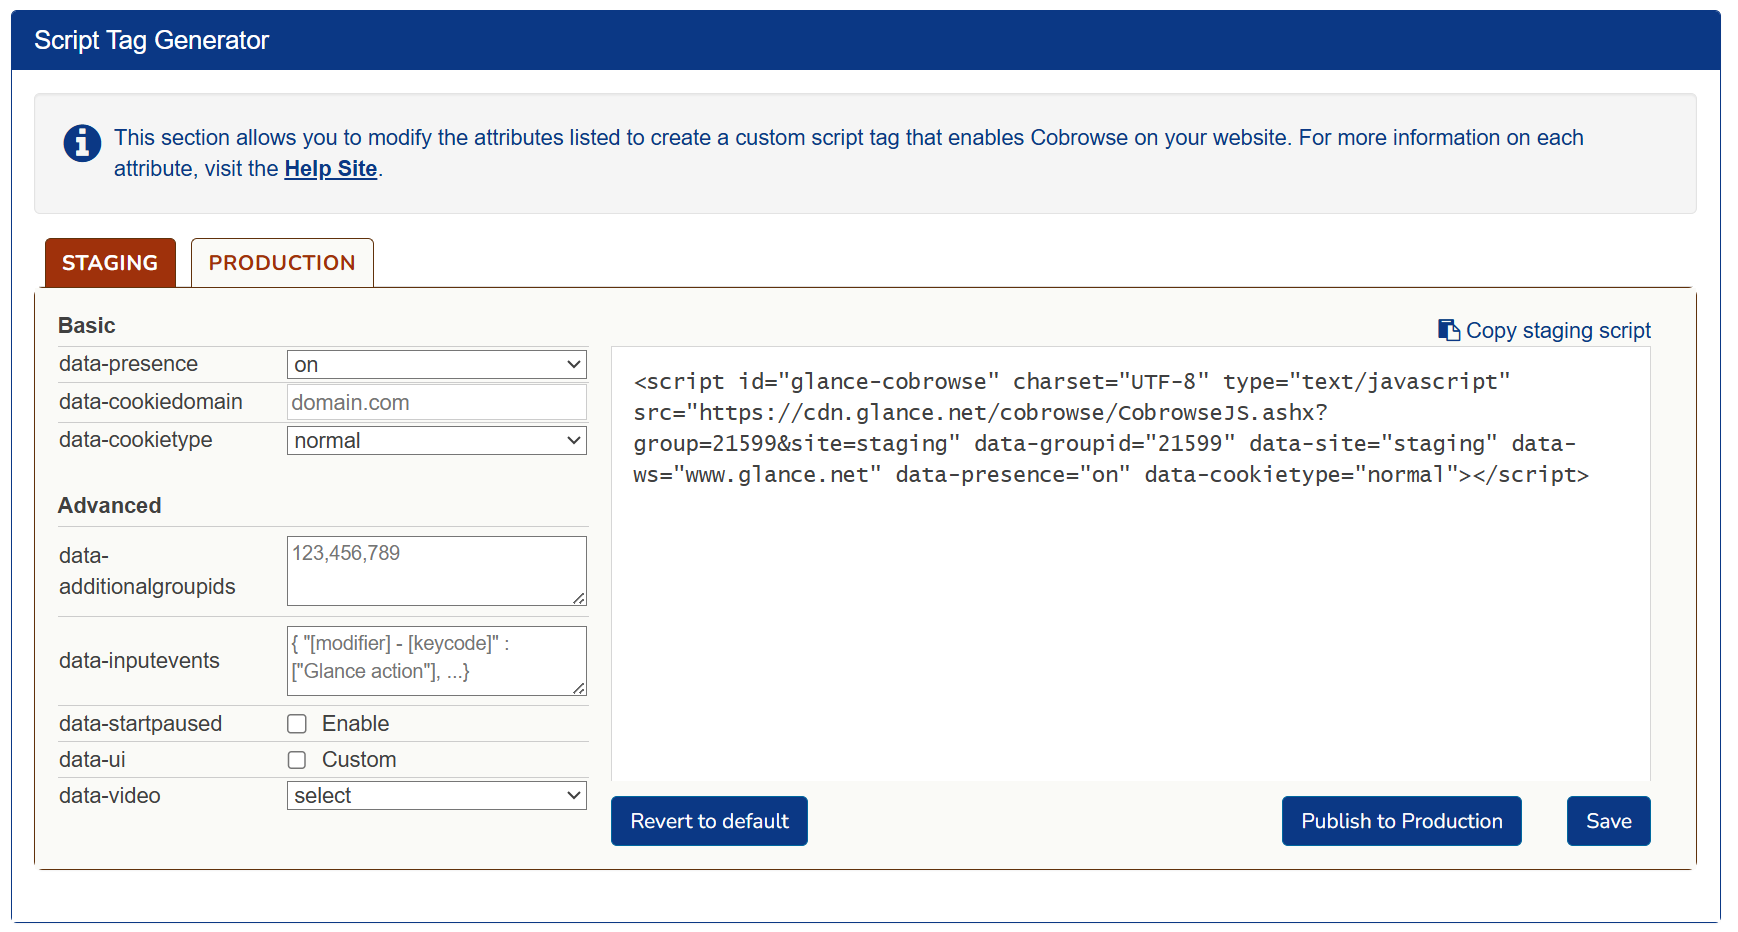
- In the bottom left corner of the Settings tab, click on Manage your Cobrowse settings. Scroll down to the Script Tag Generator section.
2. Customize the Script Tag
Modify your script tag by updating the attributes directly in the generator. Refer to the Attributes Guide for a complete breakdown of each option.
Recommendation
Glance recommends that you start with the default script tag provided in your account settings, and then customize it as needed. 3. Add the Script Tag
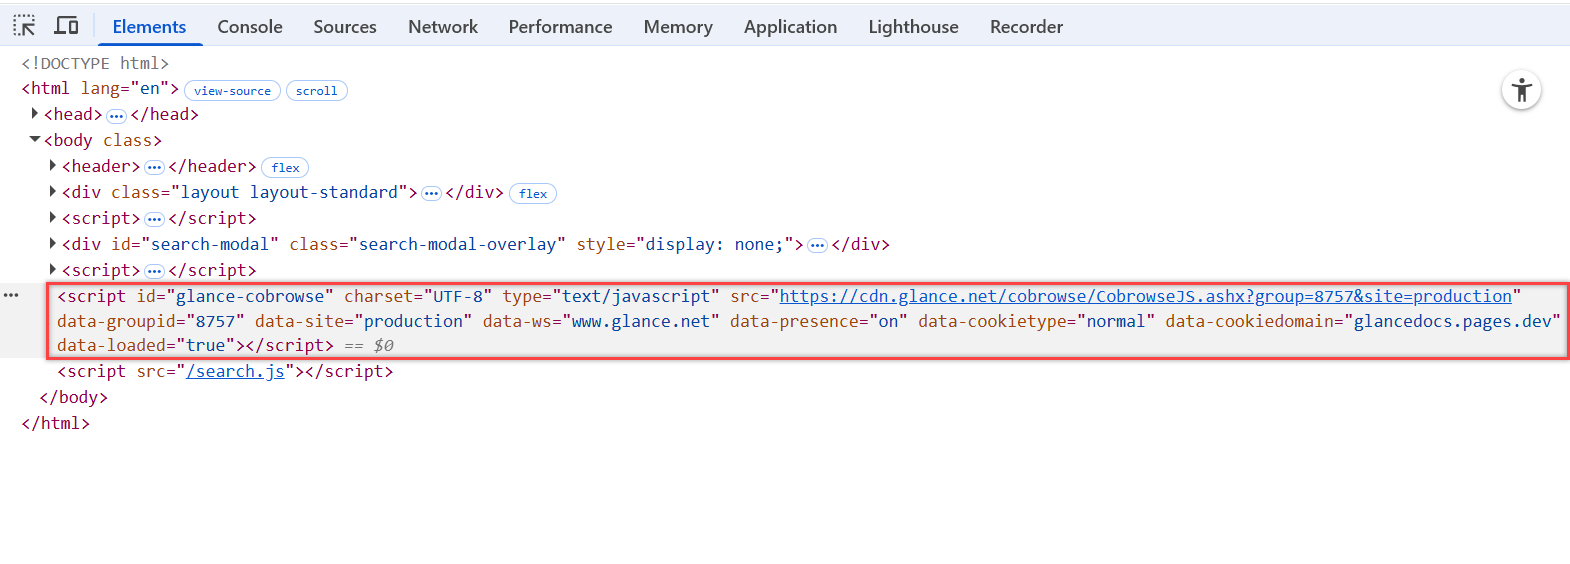
Once you have customized your tag, it must be added to all pages within the website that should be viewable by an agent.
- Location: The script tag can be placed in the
<head>or<body>section of your website. - Scope: Pages without the script tag cannot be viewed. If a visitor navigates to an untagged page during a session, the agent's screen will darken (paused state) until the visitor returns to a tagged page.
Advanced Setup
If your team uses a tag management tool (GTM, Adobe Launch), embeds iframes, or operates a self-hosted setup, refer to the Advanced Script Tag Management guide. 4. Add a Start Button
After the script is loaded, you need a way for the customer to start the session. See the Create a Session Link guide to learn how to add a Join Session button to your UI.
Next Steps
Once the visitor side is established, you need to set up the Agent side.
- Agent Join Page: The simplest way to test. Agents enter the code provided by the visitor.
- Browser Agent SDK: A fully customizable solution that lets you build the "Join" experience directly into your CRM or agent desktop.