Guide for integrating the Glance Agent Workspace as a custom connector within the Five9 Virtual Contact Center (VCC).
Prerequisites
All high-level prerequisites as listed in the Getting Started section.
Access to a Five9 Instance, and access to the Virtual Contact Center (VCC) Admin Application.
You have created a campaign and associated skill for agents you want to utilize Glance.
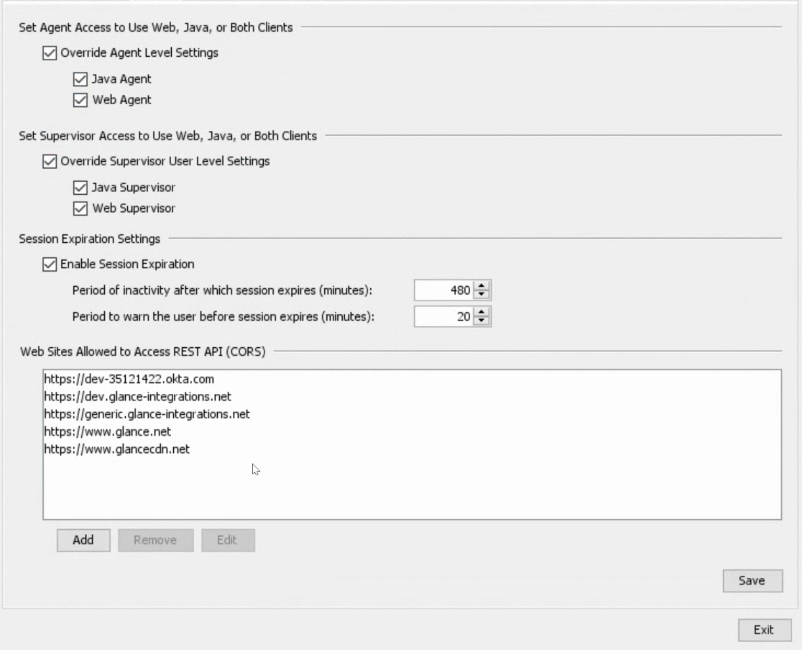
You've added the following URLs to the Allowed Sites list:
In the Virtual Contact Center (VCC) application, navigate to Actions > Configuration > Web > Web Sites Allowed to Access REST API (CORS) section and add the following URLs:
Your IDP URL, e.g. https://<your okta login>.okta.com
The URL to the Generic Package, provided by Glance.
https://www.glance.net
https://www.glancecdn.net
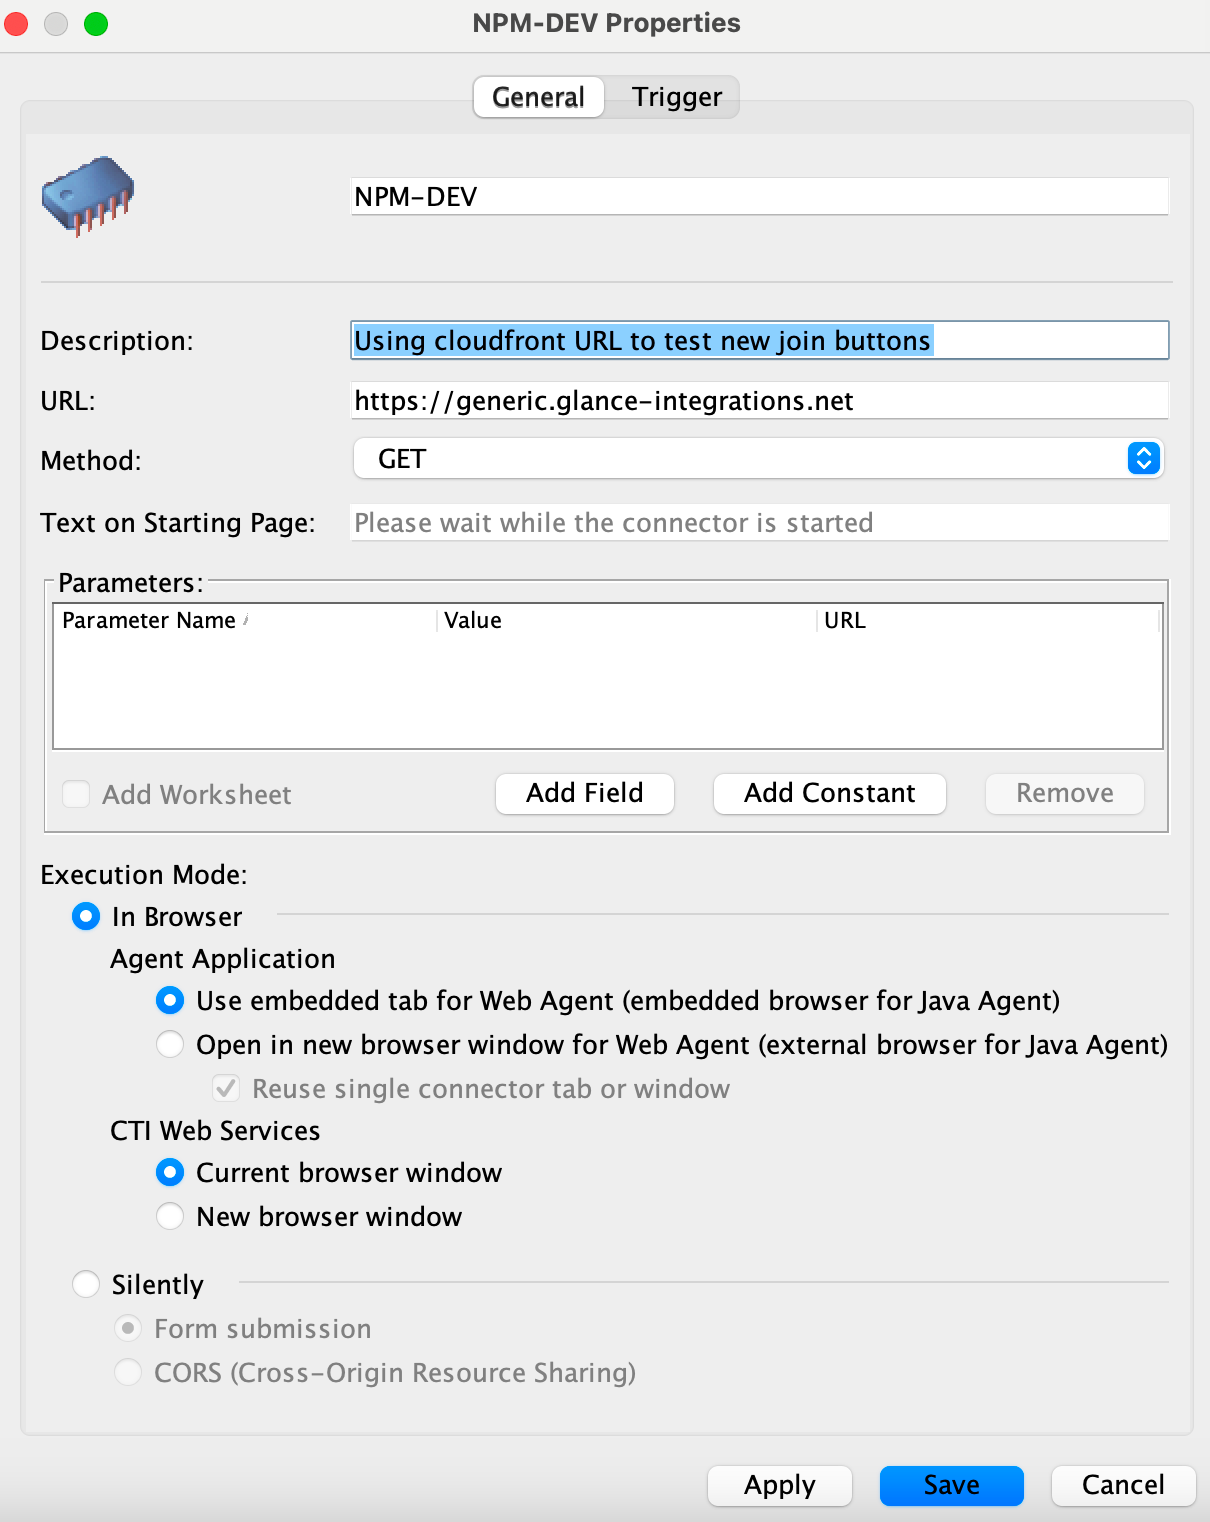
Add the Glance Connector to Five9
From the Virtual Contact Center (VCC) Admin Application, under the Connectors section, click the plus sign to create a new connector for Glance.
Enter a name and description.
For URL, enter the URL provided by Glance.
For Method, select GET.
For Execution Mode, choose In Browser.
For CTI Web Services, choose Current browser window.
Click Save.
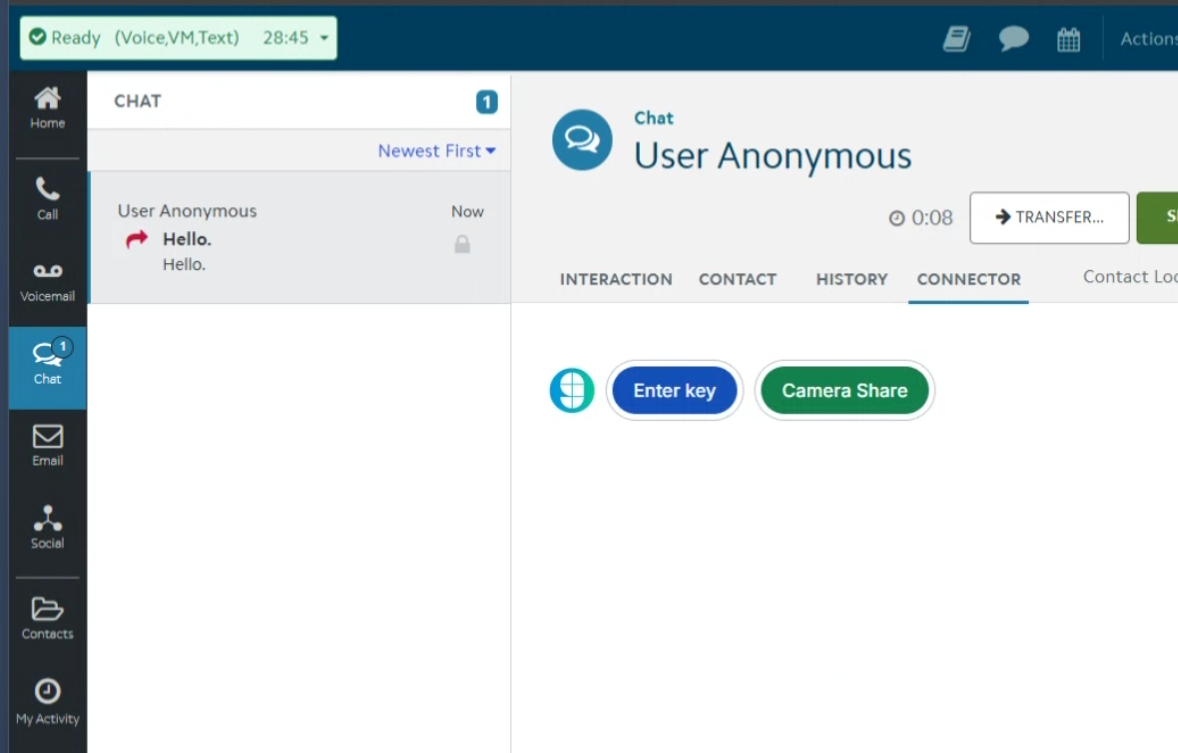
Joining Glance Sessions from Five9
Navigate to the Agent Desktop Application.
When logging in, select the skill you associated with Glance.
From the Agent Dashboard, select the Campaign where Glance is enabled.
When the interaction is started, you will be prompted to sign in to your Identity Provider to access the Glance application. Log in with your credentials.
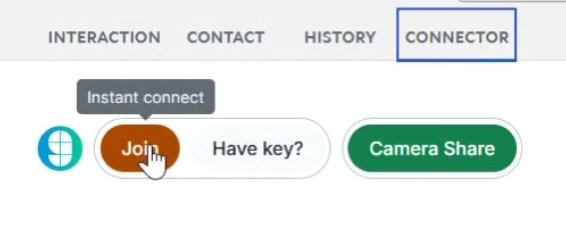
The Glance application is now available and you can join Glance Sessions.