
In version 3.44, Glance added an auto-join feature that starts Glance sessions automatically when an agent opens a record.
Prerequisites
- A Salesforce org running Glance package 3.44 or later. Contact Glance for access to 3.44.
- Presence enabled and your Glance group configured to use it. This feature is only available when using presence.
Configuring Auto Join in Glance Company Settings
Navigate to Glance Company Settings, click Edit, scroll down to the Glance Buttons section, and select the Auto Join checkbox for any objects where you want to enable this feature.
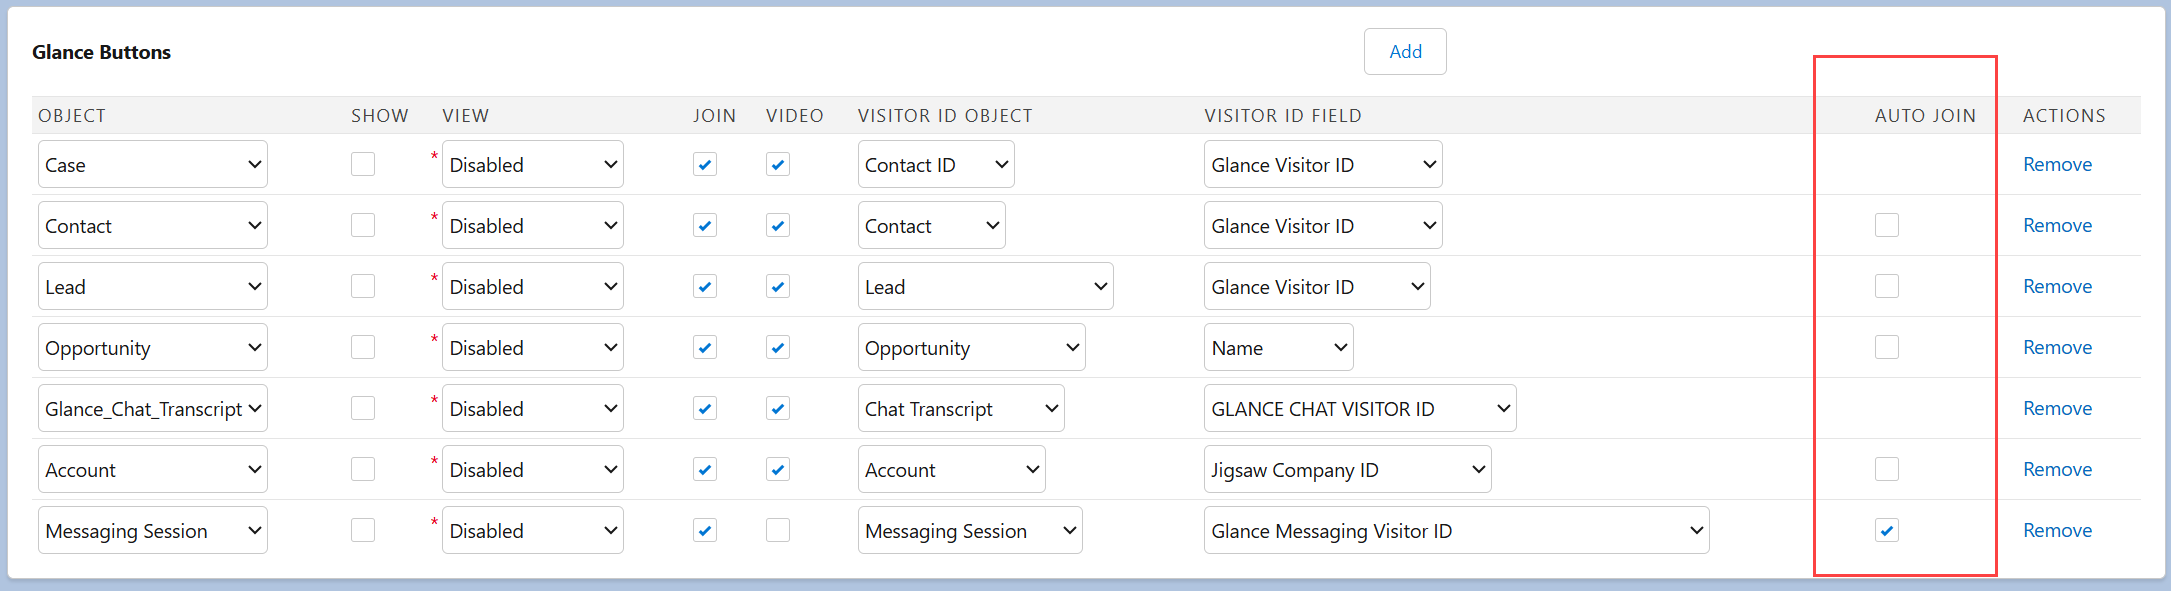
Click Save.
Configuring Auto Join with Embedded Chat and Agentforce
Prerequisites
- A Salesforce org enabled with Glance, presence, and enhanced messaging.
Select the Auto Join checkbox in Glance Company Settings for Messaging Session.
Create the auto-join field:
Navigate to Setup > Object Manager > Messaging Session > Fields & Relationships > New.
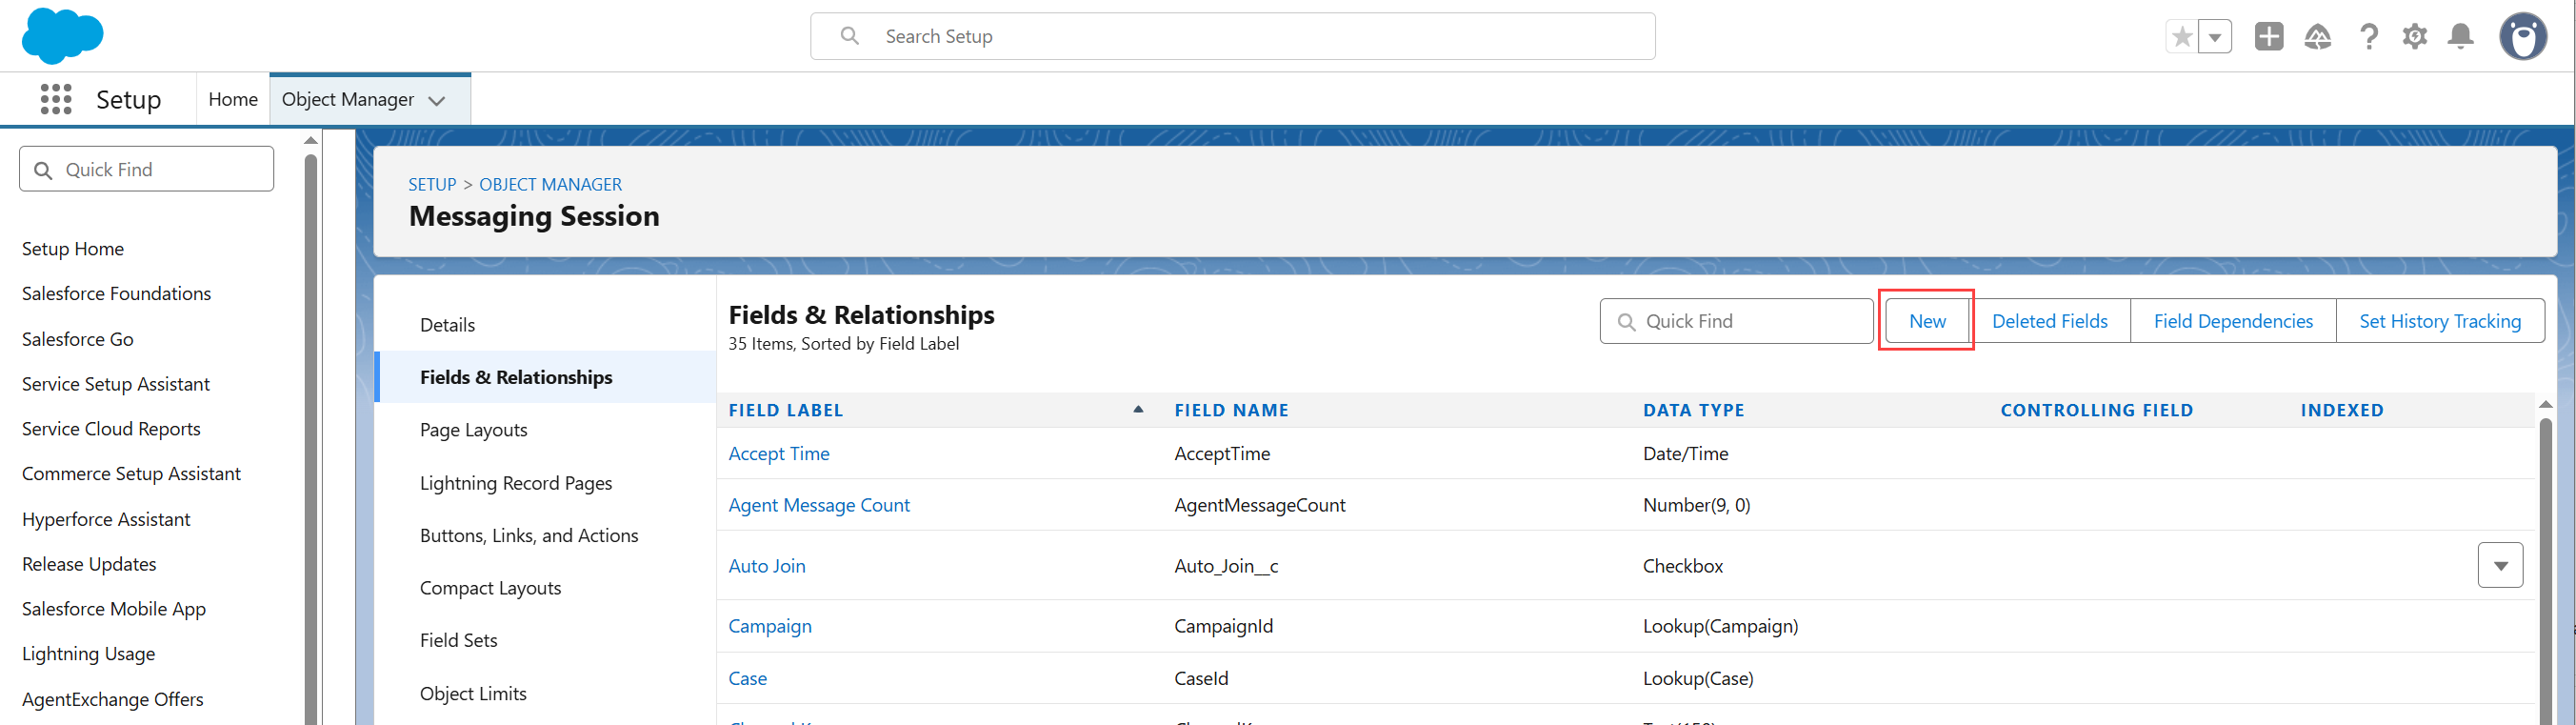
For Data Type, select Checkbox.
For Field Label, enter Auto Join.
For Default Value, choose whether auto-join is on or off by default. Setting to On enables it for all chat sessions. Setting to Off means auto-join only activates when specific conditions are met, this is useful if you want to limit it to certain scenarios.
For Field Name, let this auto-populate, then click Next.
Adjust field-level security if needed, then click Next.
For Page Layouts, select the layout where you want this field available.
Click Save.
Verify the auto-join field on the messaging layout:
Navigate to Page Layouts and confirm the auto-join checkbox appears on the object.
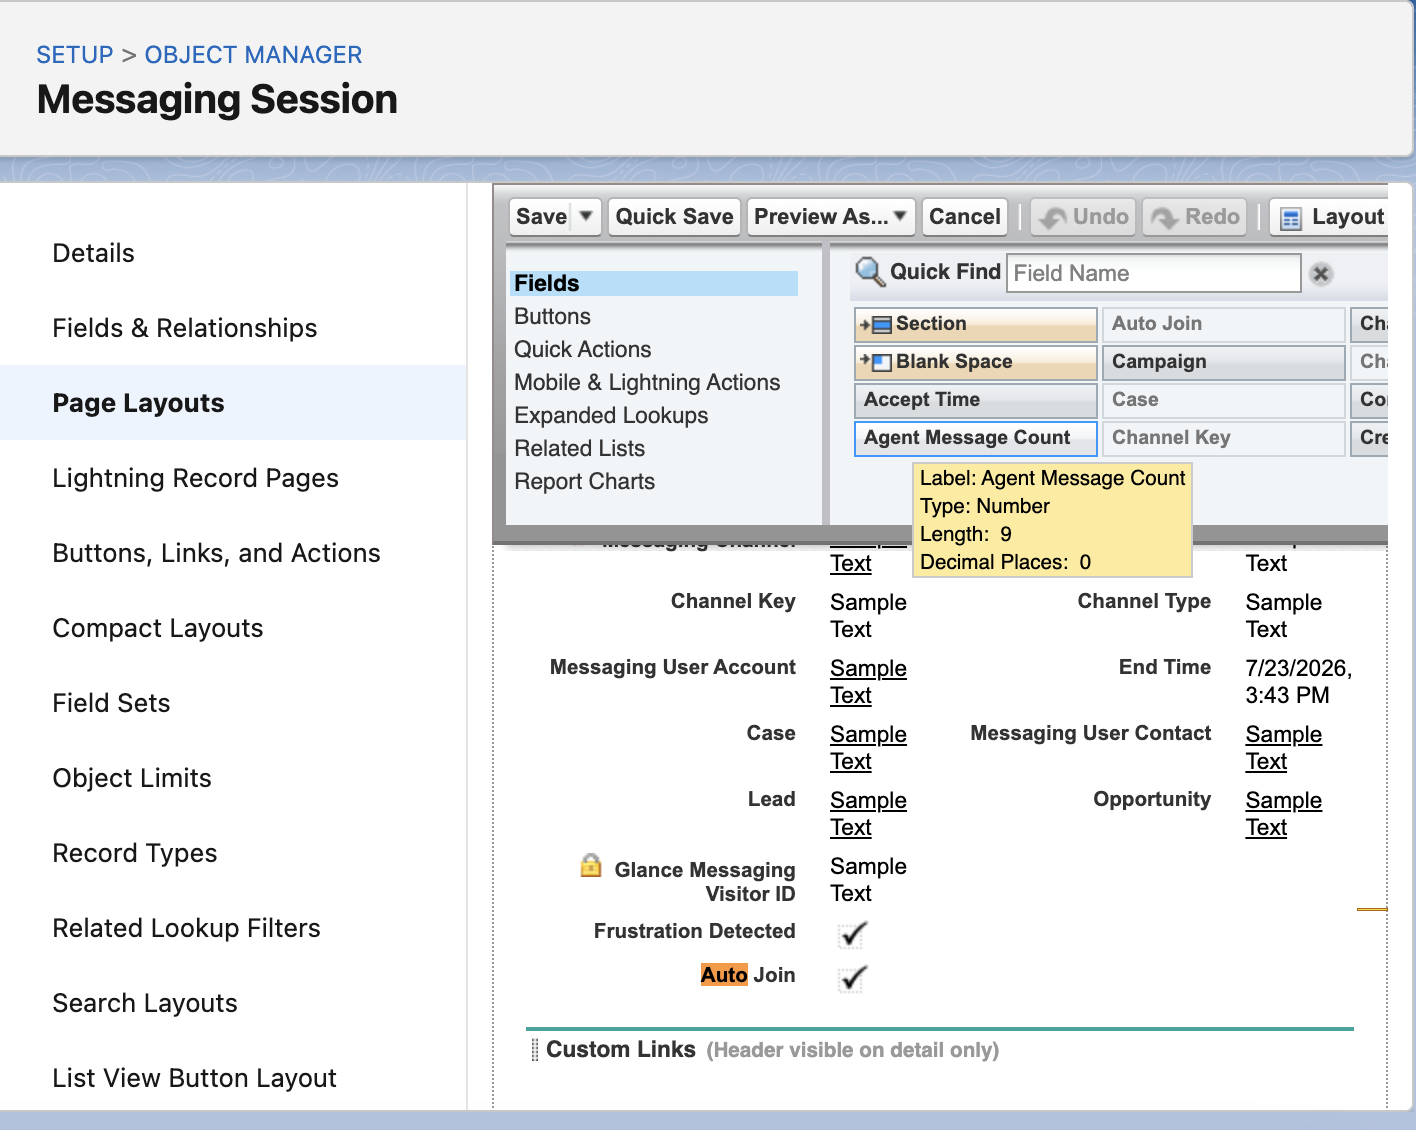
If it is not there, drag the field onto the page layout, save, and activate the layout.
How Auto-Joining Works
- Open the object where auto-join is enabled.
- If the visitor is present via chat or logged in, Glance automatically sends them a request to join the session.
- The visitor is prompted to join.
- If the visitor declines or is not present, the agent can still join manually by clicking the orange Join button or entering a key.
Glance Auto Join with Agentforce: Example
Auto-join can be triggered conditionally based on customer data or flow logic. The example below uses Salesforce Flows and Agentforce Subagents to auto-join only when certain conditions are met. Your implementation will depend on your specific use case, contact Glance for more information.
Complete the configuration above to enable auto-join.
Navigate to Setup > Object Manager > Create > Custom Object and add a custom field to the object for your condition, for example:
gold_level_customer_detected.Navigate to Setup > Flows > New Flow and create a flow that connects the condition to auto-join. The example below escalates to an agent and enables auto-join when conditions are met.
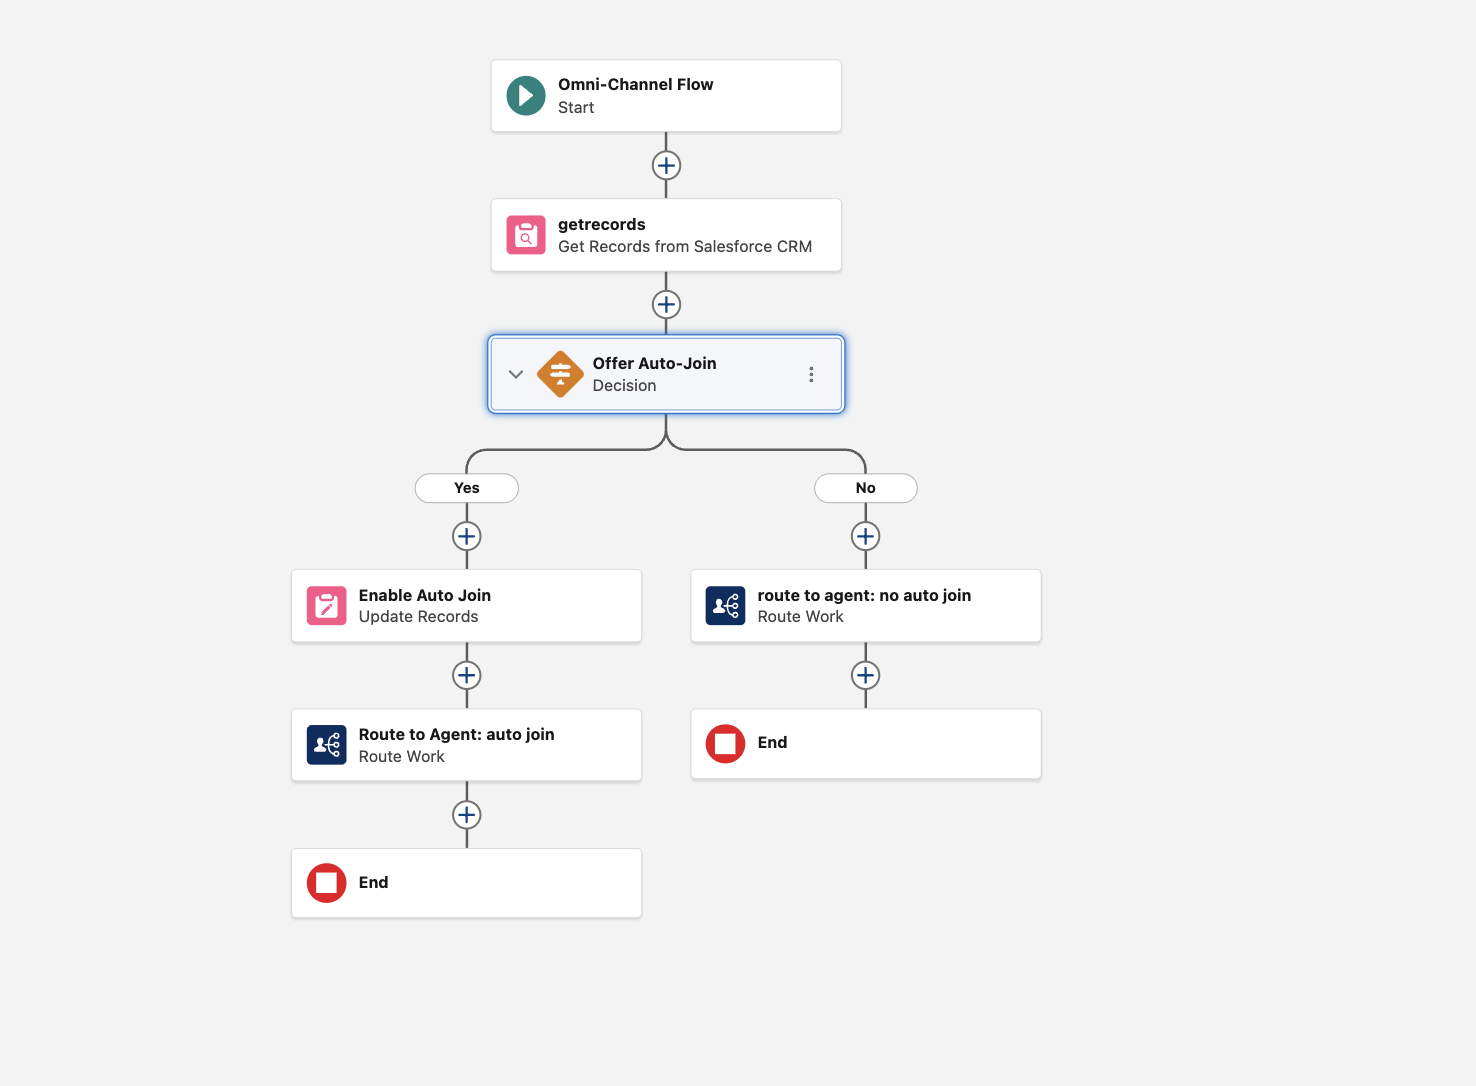
Configure the conditions that trigger the auto-join checkbox as shown in the following example:
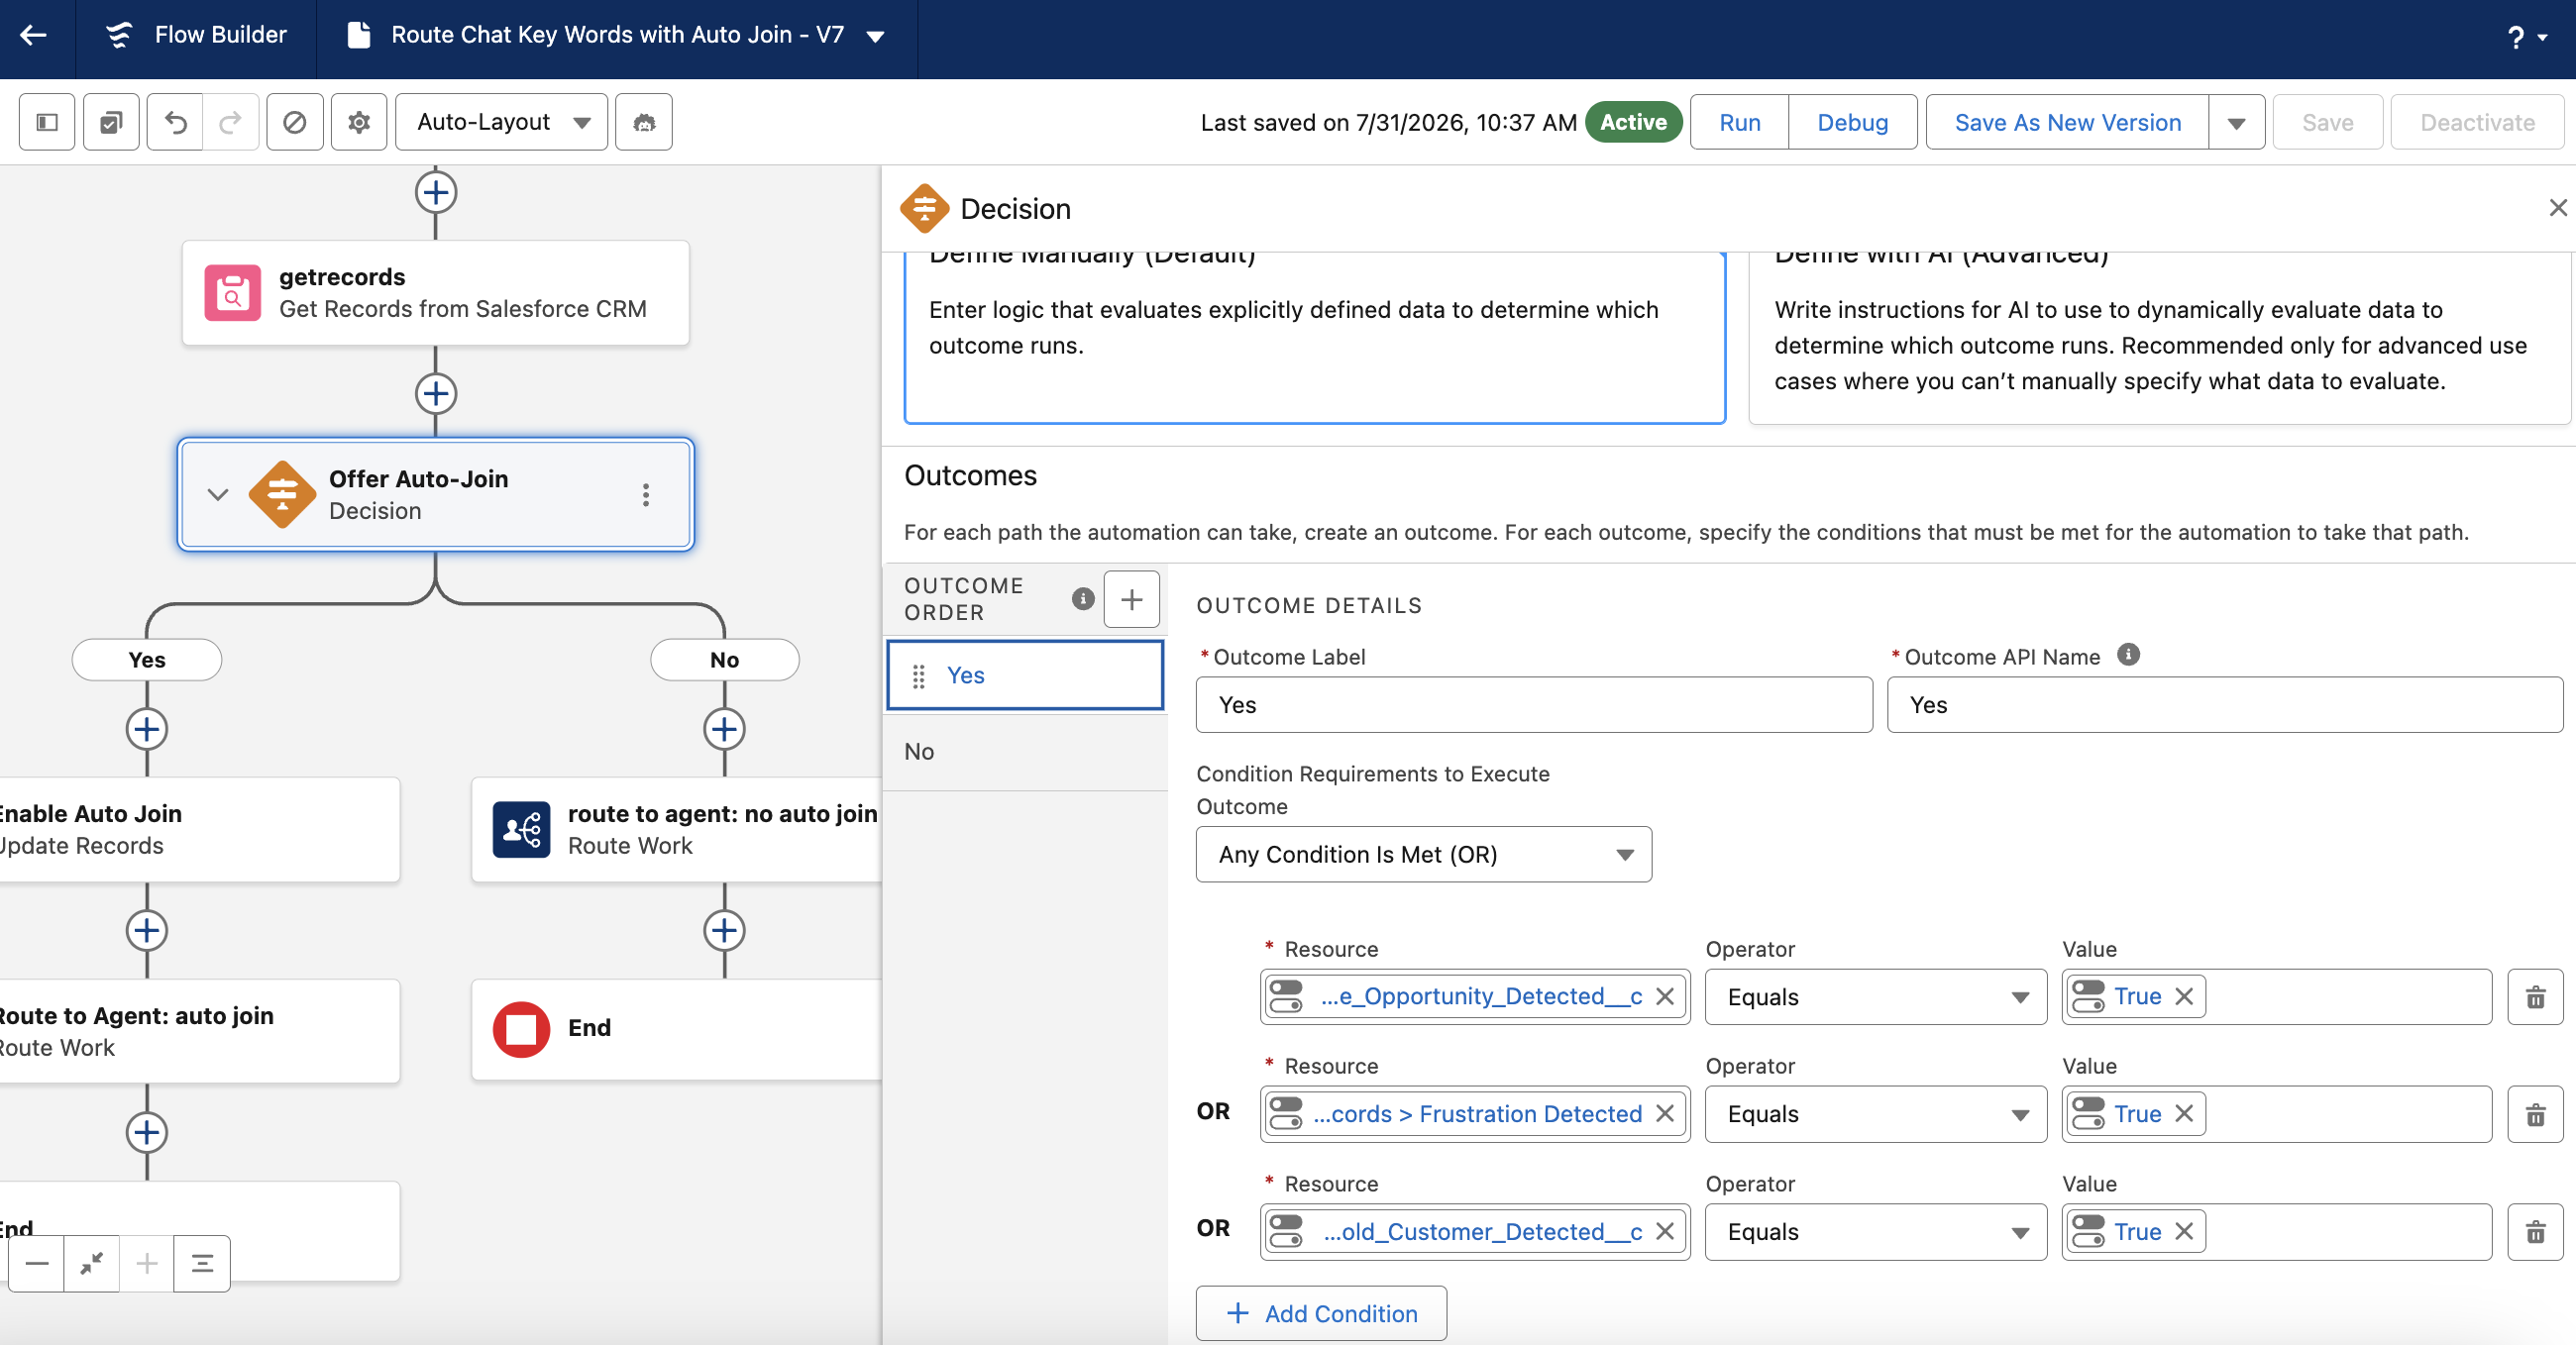
In Agentforce Studio, create a subagent with a classification description, scope, and instructions. See the Salesforce documentation for guidance.
In the subagent's Actions tab, add the flow you created to the subagent actions.
Activate and test the flow.